Add content to the book
This section covers how to add content to your book. To utilize jupyter-book you will have to ultimately become very familiar with the official jupyter-book documentation. However for the purposes of kicking the tires this section will take you through the features that are either critical to use, or just cool. Many details will be skipped for the purposes of illustrating what authoring a book with jupyter-book might be like in practice. Consider this chapter a minimum subset of the available functionality needed for authoring content.
In an effort to make learning syntax more practical this section will take you through a narrative of adding content to the book you cloned while installing jupyter-book. After getting a feel for how everything works in this section you will probably graduate to just using the jupyter-book cheat sheet to rapidly find the syntax details you need.
Your mission, if you choose to accept it, is to write a (very brief and totally fictitious) book about dinosaurs using the sample book you cloned earlier as a template. Don’t worry if your paleontology skills are rusty, the focus of this activity is on writing the described syntax. I would like to apologize in advance to actual hard working paleontologists for using your field of study as a fictions example. You can expect to accomplish the following tasks while reading this chapter.
Write some basic content
Embed (glue) results from your analysis in a jupyter notebook into your text content
File structure
If you look at the sample-book that you cloned during the install you will see the following structure and files.
sample-book: this is your top level working directorybook: this directory contains the content of your book_build: this directory is generated for you when you build the bookhtml: the html version of your book (if you chose this option)pdf: the pdf version of your book (if you chose this option).mdfiles: these are markdown files that contain mostly text.ipynbfiles: these are notebook files that contain mostly computations and analysis_toc.yml: This file controls your table of contents_config.yml: This file controls the configuration that determines the look and feel of your book
environment.yml: file anaconda uses to automatically setup your environment if you are using anacondarequirements.txt: file used to create a python virtual environment if you are not using anacondaREADME.md: describes the contents of this repository.gitignore: a file that tells git to ignore the _build directory among other things that don’t need to be in version control
We will mainly be editing the files inside the book directory to show what the content creation process is like with jupyter-book.
Setting up your book chapters
Organization is key to the writing process, imagine you have outlined the following chapters for your book:
Abstract
Introduction
Literature review
Methods
To create your book you would start by creating an empty markdown (.md) file for each of your chapters. You can name the files anything you want, but consider using similar names. The sample-book already contains the following files for you:
Abstract:
abstract.mdIntroduction:
intro.mdLiterature review:
lit-review.mdMethods:
methods.md
Note
Writing your content in a markdown (.md) file is one of two ways to author content. The other is to write the same syntax described here into a jupyter notebook (.ipynb). Both methods work equally well, but I chose to focus on markdown because I personally feel it a more appropriate method for long form works. This is purely my opinion, and as they say, your mileage may vary.
An abstract is traditionally part of a journal paper, not a book. Because print and web are not equivalent mediums there are times when you have to make accommodations for the differences. In this case your abstract will act as a landing page for your website.
If you build the book you will notice that you can only see the introduction. We need to tell jupyter-book which files are in your table of contents and therefore should be rendered to the reader. Update the _toc.yml file to include all of your chapters.
# _toc.yml

- file: abstract
  numbered: true

- file: intro
- file: lit-review
- file: methods
- file: references
Note
Notice how the .md extension is not included in the _toc.yml file. Both markdown (.md) and jupyter notebook (.ipynb) files can be designated chapters in your jupyter-book. Using notebooks directly as content is not covered in this mini-book, see the official docs for full details.
After saving your changes to _toc.yml, build your book again, and then refresh your browser, to see your new chapters.
Tip
After every prompt to add something, rebuild the book, and refresh your browser to view the changes. If the changes do not appear first check to see if you actually saved the file you were updating. You can also scroll up in the terminal and look for errors/warnings.
Because you will need to issue the build command repeatedly while authoring your book it may be useful to know how to access your command line history. In most terminals simply press the up key once to see the last command that you typed. Press the up key twice to see what you typed two commands ago, and so on. Most of the time you can simply press the up key once and then press enter to build your book.
Headings
Presumably a real outline for a book will describe more than just the chapter titles. Headings are used to define sub-sections in your book. Headings are created by using a series of ampersands:
Syntax |
Example |
Note |
|---|---|---|
# Heading level 1
## Heading level 2
### Heading level 3
#### Heading level 4
##### Heading level 5
###### Heading level 6
|
# Did dinosaurs have feathers?
|
Level 1-6 headings, denoted by number of |
Add some additional headings to your introduction (intro.md):
<!-- intro.md -->
# Introduction

Achillesaurus Diceratops Malarguesaurus Sellacoxa Zhejiangosaurus...

## Fossil record supporting the existence of feathers
There is evidence of feathers in the fossil record...

### China
These locations in China have fossils that show feathers...

### Australia
These locations in Australia have fossils that show feathers...
Regular text
Regular (body) text is simply typed into your content file without any special syntax. Add a new section with some body text at the bottom of your introduction.
<!-- intro.md -->
## Other supporting evidence for feathered dinosaurs
This is body text.

A carriage return is required to make a line break.
These two lines will be part of the same paragraph.

This line will be part of the next paragraph.
Numbered and bulleted lists
Lists are often a way to summarize key points that you hope a reader skimming your book will pay attention to, or provide step by step instructions.
Ordered lists
Syntax |
Example |
Note |
|---|---|---|
1. First item
1. Second item
    1. First sub-item
|
|
Assign every item in the list a ‘1.’ and let the compiler properly number the list. This is crucial if you later have to add an item in the middle of the list and don’t want to manually renumber. |
Unordered list
Example |
Result |
Note |
|---|---|---|
* First item
* Second item
  * First subitem
|
|
An asterisk (*) or dash (-) can be used to denote an unordered list. |
Add a list of locations where dinosaurs are found to the introduction:
<!-- intro.md -->
## Fossil record supporting the existence of feathers
There is evidence of feathers in the fossil record...

Dinosaurs with feathers have been found in:

- Asia
- Australia
- North America
- The Atlantic ocean
Code blocks
Paleontology might seem like a bastion of analog work, but like all things now days paleontologists use sophisticated computational tools to assist with their work. There are a couple of ways to draw attention to code or commands that a user following your book should use.
Commands
Any text placed inside of back ticks will be highlighted.
Syntax |
Example |
Note |
|---|---|---|
`command`
|
Run this |
Preformatted text
Any text that is indented with a single tab will be considered preformatted text. This can be useful for drawing attention to commands that a reader should execute by breaking the flow of the text.
Syntax |
Example |
Note |
|---|---|---|
Execute this command:
    $ sudo apt update
|
Execute this command: $ sudo apt update
|
Note the copy button in the upper right hand corner |
Code blocks
Snippets of code with syntax highlighting can be included in your document as well.
Syntax |
Example |
Note |
|---|---|---|
```python
import numpy as np
print(f'This is index {ii}')
```
|
import numpy as np
print(f'This is index {ii}')
|
Python is one of many languages that syntax highlighting is supported for. |
Add some instructions for installing a fictional software tool to your methods chapter (methods.md):
<!-- methods.md -->

## Install prerequisites

You can install the feather identification toolbox via `pip`:

    pip instal -U featherid

Then modify your script to locate feathers on pictures of dinosaur bones. This uses computer vision in a way that is beyond the scope of this document to explain, and your ability to understand.

```python
import featherid as fid

for i, X in enumerate(files):
    Y[i] = fid.find(X)
```
Notes
Adding notes to your content can help readers who wish to learn more investigate further without breaking the flow of your text. In jupyter-book there are two kinds of notes that can be used. Traditional footnotes and Tufte style margin notes.
Warning
Margin notes are not fully supported when generating a PDF.
Footnotes
Footnotes can be used to add an interesting comment to text that is not directly relevant to the argument of the text.
Syntax |
Example |
Note |
|---|---|---|
This is body text [^footnote-label].
[^footnote-label]: This is my footnote.
|
Dinosaurs may have had feathers 1. |
Click to follow the footnote which is located at the bottom of the page. |
Provide some additional information in your methods section by editing the text you just created for the methods section to be more professional and adding a footnote:
<!-- methods.md -->

Then modify your script to locate feathers on pictures of dinosaur bones. This uses a complex computer vision algorithm [^computer-vision], the details of which are beyond the scope of this document.

[^computer-vision]: Computer vision is a class of algorithms that mimic human vision using a series of complex mathematical operations performed on digital images. Computer vision is nothing like human vision, but some computer vision algorithms can successfully identify hard to see features - like dinosaur feathers.
Margin notes
Margin notes, or sidenotes as they were originally called, are located in the margin.
Sidenotes are like footnotes, except they don’t force the reader to jump their eye to the bottom of the page, but instead display off to the side in the margin. Perhaps you have noticed their use in this document already. You are very astute. — Tufte CSS
Syntax |
Example |
Note |
|---|---|---|
```{margin} Optional title
Margin note text goes here
```
|
See margin |
Margin notes are a great example of the web not being like print. |
Further refine your methods section by adding a margin note.
<!-- methods.md -->

```{margin} Learn more
For a review of computer vision algorithms in paleontology see *Evolving Virtual and Computational Paleontology* by Luca Pandolfi, Pasquale Raia, Josep Fortuny and Lorenzo Rook.
```

Then modify your script to locate feathers on pictures of dinosaur bones. This uses a complex computer vision algorithm [^computer-vision], the details of which are beyond the scope of this document.
```
In practice, there there are probably stylistic concerns about using margin notes and footnotes on the same paragraph. Consider picking one approach and being consistent through out your document.
Admonitions
An admonition is advice with a hint of scolding, a warning not to do something. When you’re cautioned or warned about some mistake you might be just about to make, or some looming danger, you’re receiving an admonition. — vocabulary.com
Tip
These little boxes are admonition’s. Some of the available admonitions include:
Admonition
Attention
Caution
Danger
Error
Hint
Important
Note
Title
Warning
Syntax |
Example |
Note |
|---|---|---|
```{admonition} Optional title
Text or markdown here
```
|
Watch out! Dinosaurs have sharp teeth |
Add an admonition to the end of your methods section.
<!-- methods.md -->
```{warning}
Feathers are very difficult to identify in a fossil. Extreme care should be taken when distinguishing between a feather and other grit and debris that may be present.
```
Equations
If you need to include a mathematical formula that can easily be achieved. The formula is considered inline if it flows with the text like this, \(a^2 +b^2 = c^2\). Or you can add a block formula which is centered on its own line:
Formulas are written in \(\LaTeX\). A good cheat sheet will show most of the common symbols you will need to know. If that fails you can draw the symbol with your mouse and an algorithm will identify your symbol and and show you the \(\LaTeX\) code that will generate it.
Syntax |
Example |
Note |
|---|---|---|
This is an inline formula $1/2sin(\theta)$
|
This is an inline formula \(1/2sin(\theta)\) |
|
This is a block formula

$$
f(x) = x_1 +2x_2
$$
|
This is a block formula
\[
f(x) = x_1 +2x_2
\]
|
|
This is a numbered formula

$$
z=\sqrt{x^2+y^2}
$$ (myLabel)
|
This is a numbered formula
(1)¶\[
z=\sqrt{x^2+y^2}
\]
|
See numbered references to refer to this equation by its number |
Add a numbered equation to the end of your methods section:
<!-- methods.md -->

## Calculating the hypotenuse
To calculate the hypotenuse, $z$, of a right triangle with sides of length $x$ and $y$ use the pythagorean theorem:

$$
z=\sqrt{x^2+y^2}
$$ (pythagorean)
Tables
The {list-tables} directive is provided for creating numbered tables. For example this markup produces the result seen in Table 1. See numbered references to refer to this table by its number.
Note
There is a table available in markdown as well, but I would suggest that you use the list-table directive because it is easier to write and includes a caption.
```{list-table} General characteristics of Sepia officinalis accessory sex gland ESTs [^sepia].
:header-rows: 0
:name: my-table-label

* - Number of high quality **sequenced** cDNA
  - 576
* - Number of high quality ESTs
  - 560
* - Average length of high quality ESTs (bp)
  - 974.6
* - Number of contigs
  - 37
* - Number of singletons
  - 186
* - Redundency
  - 66.7%
```
Number of high quality sequenced cDNA |
576 |
Number of high quality ESTs |
560 |
Average length of high quality ESTs (bp) |
974.6 |
Number of contigs |
37 |
Number of singletons |
186 |
Redundency |
66.7% |
Tables with more than two columns require you to describe how to spread out the columns with a :widths: auto argument. Table 2 shows an example of a three column table. Also, note the use of column headers.
```{list-table} Three column table
:header-rows: 1
:widths: auto
:name: three-column-table

* - Col 1
  - Col 2
  - Col 3
* - Data 1.1
  - Data 1.2
  - Data 1.3
* - Data 2.1
  - Data 2.2
  - Data 2.3
```
Col 1 |
Col 2 |
Col 3 |
|---|---|---|
Data 1.1 |
Data 1.2 |
Data 1.3 |
Data 2.1 |
Data 2.2 |
Data 2.3 |
Add a table to your introduction chapter:
<!-- intro.md -->

## Summary of evidence

```{list-table} Summary of feathered dinosaurs
:header-rows: 1
:widths: auto
:name: summary-table

* - Location
  - Year
  - Species
* - China
  - 2017
  - Urbacodon
* - Australia
  - 2019
  - Microceratus
* - Atlantic Ocean
  - 2020
  - Venaticosuchus
```
Figures
Figures are important for displaying visual results. The {figure} directive can be used to create a numbered figure.
Syntax |
Example |
Note |
|---|---|---|
```{figure} image-directory/file-name.jpg
:height: 150px
:name: figure-name

Figure caption written in markdown
```
|
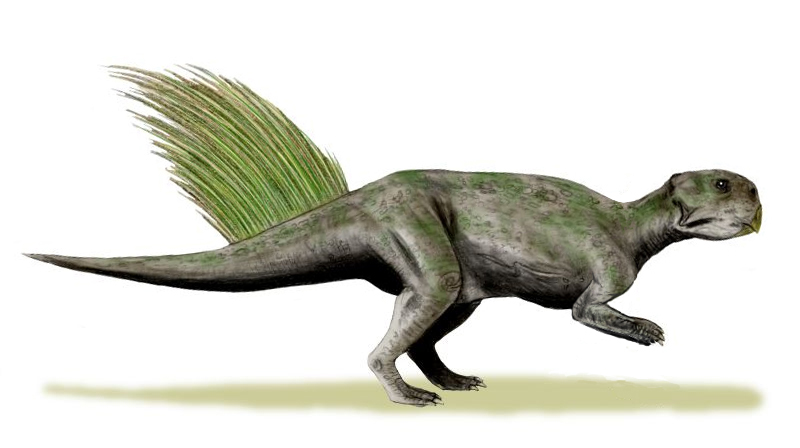
Fig. 1 Here is my figure caption! (CC BY-SA)¶ |
Add a numbered figure to your introduction chapter just after the introductory paragraph:
<!-- intro.md -->

```{figure} img/Psittacosaurus_mongoliensis_whole_BW.jpg
:height: 150px
:name: psittacosaurus

Artistic rendering of Psittacosaurus Mongoliensis [(CC BY-SA)](https://commons.wikimedia.org/wiki/File:Psittacosaurus_mongoliensis_whole_BW.jpg)
```
Cross References
Cross references are a way to refer to other sections of your document, other documents, or other resources. This includes referencing numbered equations, tables, and figures. There are multiple styles of references, and only a few are shown here. See the official docs for a full description of references. The most common types of references include:
Sections (target headers)
If you need to reference a section in your book you can use a target-header. Target headers are labels that are defined with the syntax (target-header)= in your document. Once you have defined the target header, you can link to the header. The advantage here is that you can change section titles without breaking your links. As a best practice a target header should never be modified after it is created. Readers can not see the target header so this will not be much of a burden.
Syntax |
Example |
Note |
|---|---|---|
(target-header)=
# Section title

[link text](target-header)
|
See the introduction section for more details |
Target headers must be unique throughout the entire book or you will get a duplicate label error in the console at build time. |
Add a target header to your introduction:
<!-- intro.md -->

(fossil-record)=
## Fossil record supporting the existence of feathers
Then add a reference to that section in the first paragraph of your methods chapter.
<!-- methods.md -->

...Borogovia Chaoyangosaurus Protohadros. See [support from the fossil record](fossil-record) for more details.
External links
External links allow you to link to external websites. The syntax is the same as target headers, but you supply a URL instead of a label.
Syntax |
Example |
Note |
|---|---|---|
[link text](https://example.com)
|
See the example website for more details |
Add an external link to your methods page. You could for example link to the repository of the fictional feather identification toolbox:
<!-- methods.md -->

You can install the [feather identification toolbox](https://example.com) via `pip`:
Numbered references
Numbered references point to numbered equations, tables, and figures.
Tip
Equations are the odd ball in this group. Figures and tables use the {numref} directive, while equations have their own {eq} directive. If you reference a figure or table the reference will be inserted as Figure X or Table Y. If you reference an equation it will be inserted as (#).
Equations
Syntax |
Example |
Note |
|---|---|---|
{eq}`<label>`
|
Equation (1) shows the result |
A numbered equation is needed to use this directive |
Add a reference to the numbered equation you previously added to your methods chapter:
<!-- methods.md -->

To calculate the hypotenuse, $z$, of a right triangle with sides of length $x$ and $y$ use the pythagorean theorem shown in equation {eq}`pythagorean`:

$$
z=\sqrt{x^2+y^2}
$$ (pythagorean)
Tables
To reference a table by number use {numref}`my-table-label`.
Syntax |
Example |
Note |
|---|---|---|
{numref}`<label>`
|
See Table 1 for a summary of results |
See the official docs for many more options. You need a numbered table to use this directive. |
Add a reference to the numbered table that you previously added to the introduction chapter:
<!-- intro.md -->

## Summary of evidence

{numref}`summary-table` summarizes the finding from 30 years of research into feathered dinosaurs.
Figures
Syntax |
Example |
Note |
|---|---|---|
{numref}`<numbered-label>`
|
See Fig. 2 for the relationship between… |
See the official docs for many more options. You need a numbered figure to use this directive. |
Add a reference to the numbered figure that you previously added to the introduction chapter.
<!-- intro.md -->

...Turanoceratops Magyarosaurus Tatankacephalus Nambalia. See {numref}`figure-example` for an artistic rendering of a potentially feathered dinosaur.
Glue results from your notebooks
This next section covers a key element of jupyter-book, the ability to embed results from a jupyter notebook into your content. This enables the development of executable books. Adding this capability will slow your writing process down considerably, but over the course of multiple revisions it may just save your sanity. This is a key tradeoff to understand when you are kicking the tires of jupyter-book.
Warning
This section uses a previously created notebook to allow us to focus on authoring content with jupyter-book. If you are new to jupyter notebooks this section wont make much sense and you will probably fail to grasp how wildly awesome this capability is.
Using jupyter notebook as well as gluing content is completely optional, but you can read more about notebooks to get a feel for their true power. Notebooks are the reason jupyter-book exists, not the other way around, so having a least a superficial understanding of what they do and why you would want to use one will help you understand if jupyter-book is a good fit for your use case.
Jupyter notebook installs with jupyter-book, so you can open jupyter notebook from the command line with jupyter notebook --no-browser. Follow the link provided in the console to open the GUI. Then, dive into one of the many jupyter notebook tutorials.
Your writing process likely starts with an analysis of some kind. After days (or weeks, or months…) of meticulous data collection and analysis you finally arrive at a result that you believe is publishable. At that point you would fire up jupyter-book and start describing your results. If your analysis occurred in a jupyter notebook there are two major use cases for embedding notebook results to consider:
In all cases you make a variable or figure available in your notebook with the glue('<label>',<variable>) function. The variable is the object that you created in your notebook. You can give it an easy to remember name with the label. You reference the label in your writing when you use the glue directive. See below for the specific use cases of the glue directive to embed content.
Important
The critical benefit of gluing notebook outputs into your document is when you update the variable in your notebook, the changes automatically propagate into your document the next time you rebuild your book. Just make sure your notebook is inside your book directory and jupyter-book takes care of the rest.
Numerical content
Numerical content is just numbers.
Syntax |
Example |
Note |
|---|---|---|
The answer to the
“Great Question” of “Life,
the Universe and Everything”
 is {glue:}`myLabel`.
|
The answer to the “Great Question” of “Life, the Universe and Everything” is |
In practice you may need to round your results to a few significant digits. All of the python format strings can be used with the {glue:text} directive.
Syntax |
Example |
Note |
|---|---|---|
The result was {glue:text}`avg`
(95% CI {glue:text}`lower`/
{glue:text}`upper`).
|
The result was 2.9263482574064237 (95% CI 0.9899746614939711/4.8627218533188765). |
Unformatted text |
The result was
{glue:text}`avg:2.2f`
(95% CI {glue:text}`lower:2.2f`/
{glue:text}`upper:2.2f`).
|
The result was 2.93 (95% CI 0.99/4.86). |
Formatted as a two digit floating point number. See the string formatting cookbook for help formatting outputs. |
Glue an output from the sample notebook into the end of your methods chapter.
<!-- methods.md -->

## Average feather length
From a sample of 100 dinosaurs, the observed feather length was {glue:text}`avg:2.2f` (95% CI {glue:text}`lower:2.2f` / {glue:text}`upper:2.2f`).
Figures
Figures typically help to visualize the results of an analysis. A figure can be added to a document with a just a {glue:}`<figure-label>`, but it is usually more helpful in a technical document to add a numbered figure with a caption.
Syntax |
Example |
Note |
|---|---|---|
```{glue:figure} <figure-label>
---
figwidth: 150px
name: "<figure-reference-name>"
---

Figure caption written in markdown
```
|

Fig. 2 Feather length vs bone diameter¶ |
See numbered figures to refer to this figure by its figure number. |
Modify your methods chapter again to glue a figure into the chapter.
<!-- methods.md -->

## Average feather length
From a sample of 100 dinosaurs, the observed feather length was {glue:text}`avg:2.2f` (95% CI {glue:text}`lower:2.2f` / {glue:text}`upper:2.2f`). See {numref}`fig:random` for a correlation of feather length to bone diameter.

```{glue:figure} random-fig
---
name: "fig:random"
---

Feather length vs bone diameter (completely fictional data) for fossils analyzed with the feather identification toolbox (also fictional).
```
Citations
Citations require couple steps.
Generate a references.bib file and place it in your
bookdirectory. This should be a standard option in any reference manager (e.g. Zotero). Seereferences.bibif you need a sample.bibfile for testing.Cite using the directive
{cite}`citation-label`Include a list of citations at the end of the document
Syntax |
Example |
Note |
|---|---|---|
{cite}`citation-label`
|
As described in [Sto15] |
The citation will not display properly until the bibliography is linked as shown below |
Then include the bibliography with:
```{bibliography}
```
Your bibliography will be automatically generated like this, and citations can be formatted multiple ways.
- Sto15
James V. Stone. Bayes' rule with Python: a tutorial introduction to Bayesian analysis. Sebtel Press, Sheffield, England, first edition, 2015. ISBN 978-0-9933679-3-9. OCLC: ocn970361039.
Create a references.bib file in your book directory with the following citations:
@book{stone_2015,
	address = {Sheffield, England},
	edition = {First},
	title = {On the prospect of dinosaurs with feathers and other unusual phenomena},
	isbn = {123-4-56789-1-2},
	shorttitle = {Dinosaurs with feathers},
	language = {en},
	publisher = {Nobody Press},
	author = {Stone, James K.},
	year = {2015},
	note = {OCLC: ocn970361039},
}

@book{lambert_2018,
	address = {Los Angeles},
	title = {A long walk in a swamp looking for dinosaur feathers},
	isbn = {123-4-56789-1-2},
	shorttitle = {Looking for dinosaur feathers},
	language = {en},
	publisher = {SAGE},
	author = {Lambert, Benjamin},
	year = {2018},
}
The edit your literature review chapter to contain some citations.
<!-- lit-review.md -->

...Saltopus Pegomastax. Previous work on dinosaur feathers includes {cite}`stone_2015` and {cite}`lambert_2018`.
Then link your bibliography:
<!-- lit-review.md -->

```{bibliography}
```
Note
The HTML and PDF outputs handle the bibliography differently. The HTML version puts the bibliography on the page that the link is located on. The PDF puts the bibliography at the end of the book as its own chapter.
Annotations
A very cool integration that jupyter-book makes available is annotations. An annotation is a way for readers to make notes on your document. Seeing is believing, so view the demo on the jupyter-book website to see it in action and learn how to adjust the _config.yml file to enable annotations.
Conclusion
If you have made it this far and followed along in the creation of a book about dinosaurs then you have sufficiently kicked the tires on jupyter-book at this point. There should be nothing preventing you from renaming your repo/book and then starting to add meaningful content. Many aspects of jupyter-book were skipped, but hopefully you got to see all the bits that are important to the writing process. The conclusion includes some notes on possible next steps.
- 1
This is my footnote which wil be placed at the bottom of the page. Conveniently you can click on the footnote number to return to the text that contains the note.
- 2
Enault, Jeremy & Zatylny-Gaudin, Celine & Bernay, Benoît & Lefranc, Benjamin & Leprince, Jérôme & Baudy-Floc’h, Michèle & Henry, Joël. (2012). A Complex Set of Sex Pheromones Identified in the Cuttlefish Sepia officinalis. PloS one. 7. e46531. 10.1371/journal.pone.0046531.